
Install to code: plan, protect surfaces, route a safe chimney, and test.
If you want a warm, efficient hearth, you need more than a pretty stove. In this guide, I’ll show you how to install a wood burning stove the right way, using clear steps and field-proven tips. I’ve helped homeowners plan layouts, pass inspections, and get that first clean burn. Follow along and you’ll understand the process, the code, and the small details that keep your home safe.
Safety, codes, and planning essentials
Installing a stove is about safety first. It involves fire, hot surfaces, and exhaust. Before you buy a unit, check local building codes and permits. Most places require an inspection.
Use gear that meets national standards. Look for EPA-certified stoves and UL-listed pipe. Read the manual for your exact model. It sets the clearances you must follow.
Plan the location with safety in mind. Keep it out of traffic paths. Avoid bedrooms and small enclosed rooms. You will also need a smoke alarm and a carbon monoxide detector. Keep a Class A fire extinguisher nearby.
I have seen good installs fail only due to planning. A tight corner, a long horizontal run, or poor wall protection can cause smoke, poor draft, or denied permits. A good plan solves most of that.
Tools, materials, and parts checklist
Have everything on-site before you start. A stop-and-go job invites mistakes. Here is a simple list I use on every project.
Stove and core parts
- EPA-certified wood stove with manual and parts
- Stove legs or pedestal, and an ash pan if included
- Outside air kit if the home is very tight
Venting and chimney
- Double-wall stovepipe or single-wall (as allowed)
- Chimney system rated for solid fuel, Class A stainless
- Ceiling support box or wall thimble
- Firestop spacers and attic insulation shield
- Flashing, storm collar, and chimney cap
- High-temp silicone sealant and stove cement
Protection and fasteners
- Noncombustible hearth pad with correct R-value
- Wall shield or heat shield spacers if needed
- Screws, lag bolts, masonry anchors as needed
- Roof boots, roofing screws, and butyl tape
Tools and safety gear
- Tape measure, square, and level
- Stud finder and masonry drill bits
- Hole saws and a reciprocating saw
- Tin snips and crimping tool
- Caulk gun and putty knife
- HEPA vacuum and drop cloths
- Gloves, safety glasses, and an N95 or P100 mask
Clearances, hearth, and wall protection
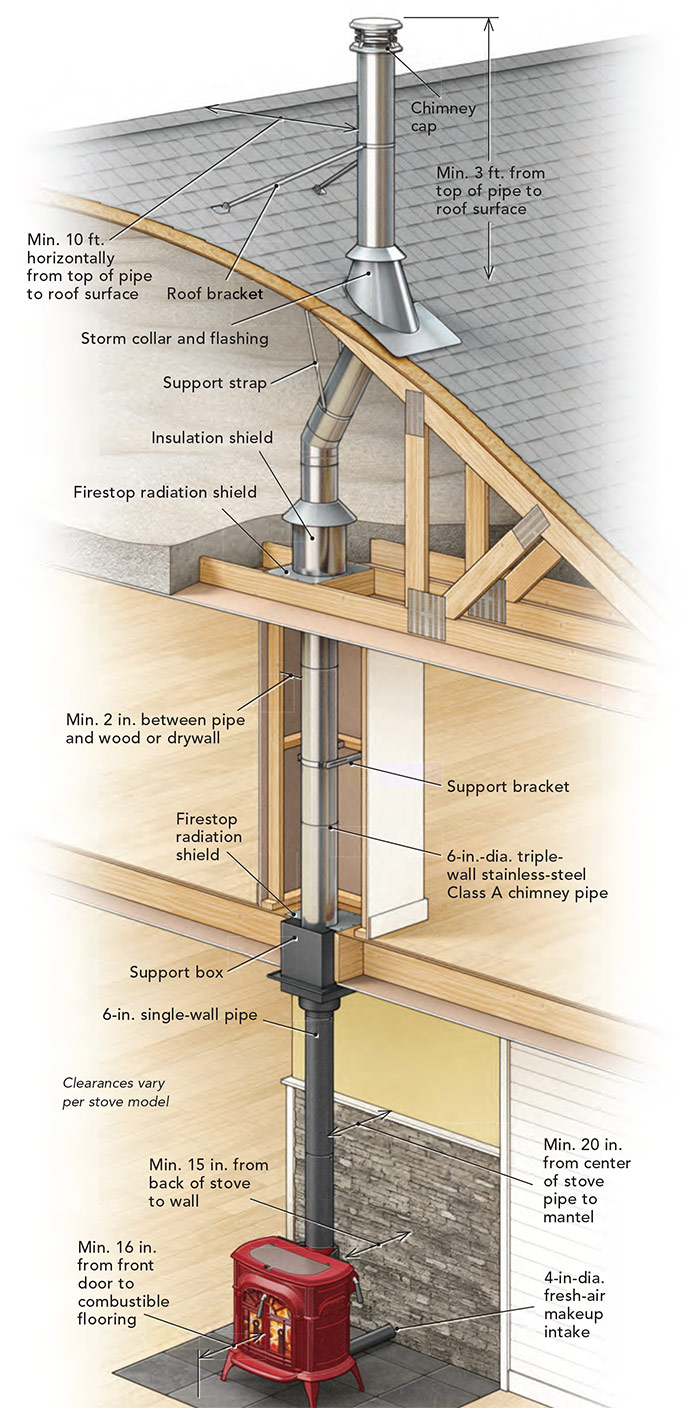
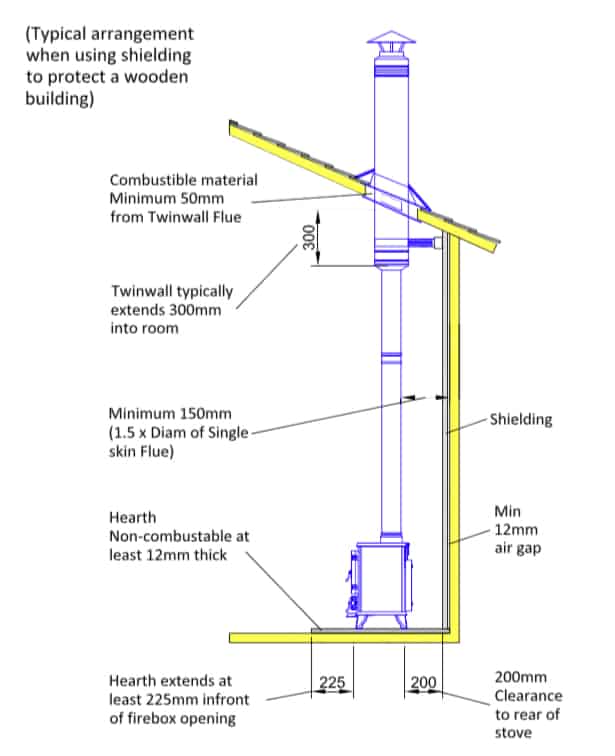
Clearances are the heart of safety. The stove manual sets minimum distances from combustibles. Many stoves need 36 inches with no shield. Some list less. Do not guess. Follow the manual.
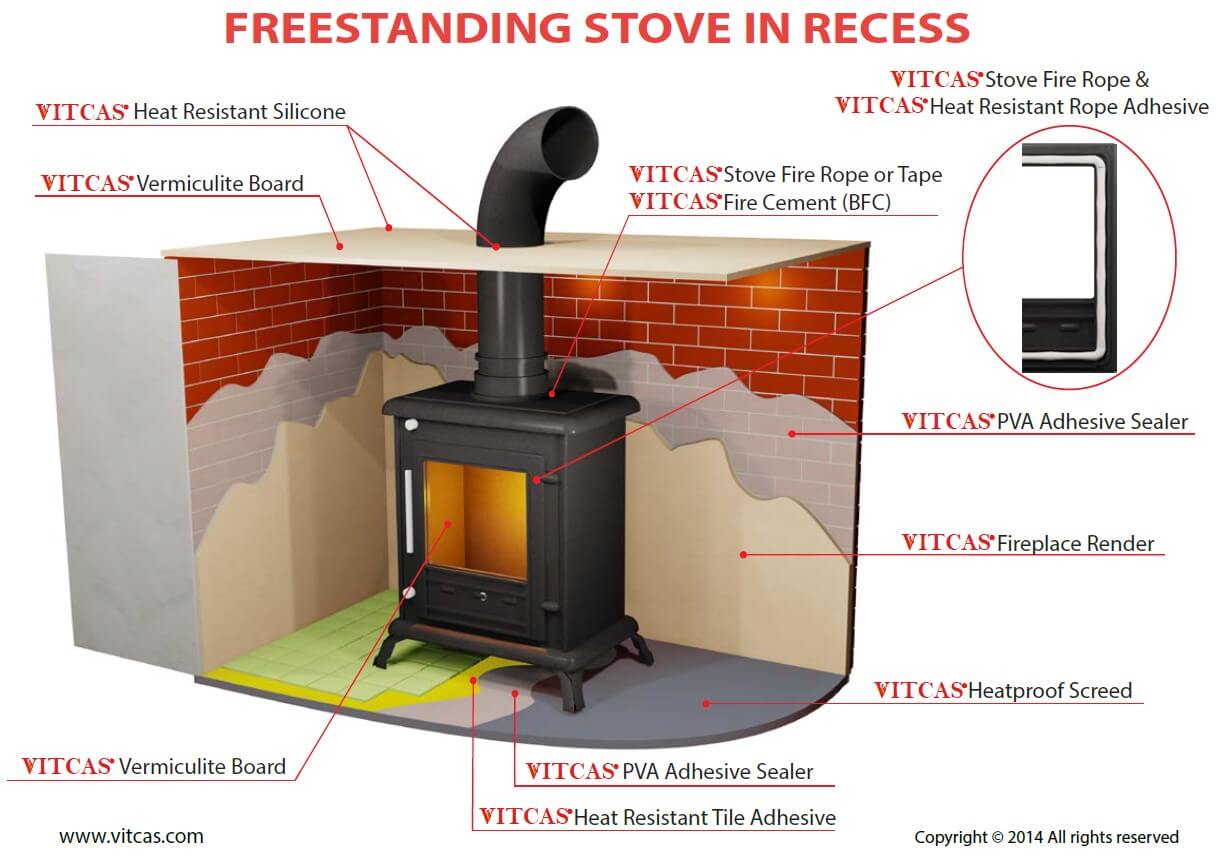
Wall protection can reduce clearances. A ventilated heat shield can cut clearances, often by two-thirds. The shield must stand off the wall on spacers. Leave a gap at the bottom and top for air flow.
The hearth must protect from heat and embers. Check the R-value the stove needs. Many require an R of 1.0 or more. Common hearths use cement board and tile or a listed pad. The hearth should extend past the door. A common rule is 8 inches at sides and back, and 16 to 18 inches in front.
On one job, a client bought a thin pad online. It looked nice, but failed the R-value. We rebuilt with a layered board under tile. The inspector approved it at once.

Choosing and routing the flue and chimney
Draft is your engine. A straight, vertical chimney drafts best. Keep bends to a minimum. Two 45-degree elbows flow better than one 90.
Follow the 3-2-10 roof rule. The chimney must be 3 feet above the roof where it exits. It must be 2 feet above any part of the roof within 10 feet. Taller stacks often draft better.
Use a Class A chimney for all sections outside the room. Do not run stovepipe through walls, ceilings, or attics. Through a wall, use a listed wall thimble and switch to Class A chimney. In a ceiling, use a support box and a firestop. Keep all clearances in the attic.
Limit the horizontal pipe. Give it a rise of about a quarter inch per foot. Keep the total connector length short. I aim for no more than 6 feet indoors.
Step-by-step: how to install a wood-burning stove
Use this sequence to avoid rework. It matches how inspectors review the job. If you are not sure about any step, hire a licensed pro.
- Confirm permits and codes
- Pull permits if required.
- Confirm stove model, location, and vent route with the authority.
- Mark layout and clearances
- Find studs, joists, and rafters.
- Mark the hearth size, wall protection, and centerline for the flue.
- Build the hearth
- Install layers to meet the R-value.
- Finish with tile or a listed hearth pad.
- Keep it level and square to the wall.
- Add wall protection if needed
- Install spacers and noncombustible board.
- Leave air gaps at the bottom and top.
- Finish with tile or metal if desired.
- Dry fit the stove
- Place the stove on the hearth.
- Check clearances on all sides.
- Adjust the position for the best pipe alignment.
- Install the ceiling support or wall thimble
- Cut openings to the template size.
- Maintain framing clearances to combustibles.
- Add a firestop where the pipe passes through the floors.
- Assemble chimney
- From the support box or thimble, run Class A chimney.
- In attics, add an insulation shield.
- Flash the roof exit with proper flashing and a storm collar.
- Finish with a listed cap.
- Connect the stovepipe
- Fit the connector pipe from the stove to the support box or thimble.
- Crimped ends go toward the stove to keep creosote inside.
- Secure with the specified screws.
- Seal and secure
- Use high-temp sealant where the manual allows.
- Do not seal slip joints that must move.
- Check that all joints are tight and supported.
- Inspect and test
- Have the authority inspect if required.
- Do a cold smoke test with incense.
- Check for leaks and proper draft.
- First small fire
- Cure paint with small, hot fires.
- Open a window a bit to help draft.
- Watch for smoke or smells that signal leaks.
I teach clients this flow because it catches mistakes early. It shows you how to install a wood-burning stove without surprises on inspection day.

Sealing, smoke testing, and the first burn procedure
A simple smoke test can save a call-back. Light an incense stick and trace every joint. Watch for any wisp of smoke drift. Fix leaks before the first fire.
On the first burn, start small. Use dry kindling and a few small splits. Keep the door cracked for a minute to warm the flue. Then close the door and set the air controls. Expect some paint odor at first. That fades after two to three burns.
I keep a notepad on site. I record draft feel, top temperatures, and any smell. That habit helps me spot issues before they grow.
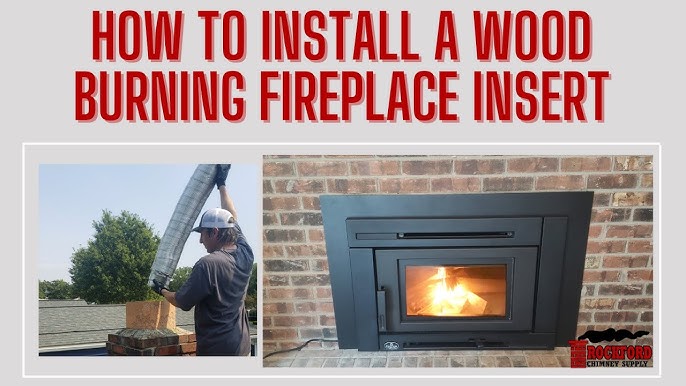
Efficiency, fuel, and ongoing maintenance tips
Good fuel makes a huge difference. Burn only seasoned wood at 15 to 20 percent moisture. Use a moisture meter to check splits. Wet wood makes smoke, creosote, and poor heat.
Run the stove hot enough. Long, smoky burns coat your chimney. Aim for bright flames and clear exhaust after startup. Add larger splits once the firebox is hot.
Clean the chimney at least once a season. More if you burn daily. Check baffles, gaskets, and firebricks. Replace worn door gaskets to keep a tight seal.
These habits are part of how to install a wood-burning stove with long-term success. The install is day one. The maintenance is every day after.

Costs, timeline, and common mistakes to avoid
Most homeowners ask about the budget. A typical job ranges widely. Expect costs for the stove, chimney parts, hearth build, labor, and permits. DIY can save labor, but do not cut corners.
Common mistakes I see
- Skipping permits or inspections
- Ignoring the manual’s clearances and hearth R-value
- Too many elbows and long horizontal runs
- Using drywall screws or the wrong fasteners
- No CO detector, no smoke alarm, no fire extinguisher
Plan one to two days for a clean install. Complex roofs or masonry work can add time. Build in a day for inspection and a day for weather delays.

Troubleshooting common issues after installation
Weak draft
- The chimney may be too short or too cool.
- Warm the flue with a top-down start and consider adding height.
Smoke spillage on reload
- Open the air and wait a minute before opening the door.
- Crack the door first to equalize pressure.
Creosote buildup
- Wood may be wet or burn too cool.
- Burn seasoned fuel and sweep the chimney.
Overheating
- Load less wood and close the air sooner.
- Check door gaskets and baffles.
These fixes round out how to install a wood-burning stove and keep it running well.
Frequently Asked Questions
Do I need a permit to install a wood stove?
Yes, most places require a permit and inspection. Check with your local building department before you start.
How tall should my chimney be for a good draft?
Follow the 3-2-10 rule and your manual. Many homes see better draft with 15 feet or more of total height.
Can I vent a wood stove into an existing fireplace chimney?
Yes, but it must be lined with a properly sized, listed liner. An oversized or unlined flue will draft poorly and can be unsafe.
What clearances do I need from walls and furniture?
Use the clearances in your stove manual. If needed, add a compliant heat shield to reduce clearances safely.
Do I need outside air for my stove?
In tight homes or code zones, yes. An outside air kit can improve draft and reduce negative pressure.
Can I use single-wall stovepipe?
Often yes for the room connector pipe, but keep 18 inches to combustibles. Many installs use a double-wall for better draft and less clearance.
Conclusion
Now you know how to install a wood-burning stove from plan to first fire. You can place the stove, protect your home, route a safe chimney, and pass inspection with confidence. Small details, like hearth R-value and clean joints, make a big difference.
If you feel unsure at any step, bring in a certified installer. Your safety is worth it. Ready to move forward? Save this guide, check your local code, and start planning your warm, efficient hearth.
Pingback: How To Change Clock On GE Stove: Quick Guide 2026
Pingback: How Do Living Roofs Support Biodiversity: Quick Guide 2026
Pingback: How To Change Clock On GE Stove: Quick Guide 2026