Kitchen faucet cartridge replacement stops drips, restores pressure, and saves water fast.
If your handle is hard to turn, the faucet drips, or water temperature swings, you likely need kitchen faucet cartridge replacement. I’ve done dozens in homes new and old, and the fix is often simple, fast, and cheap. Stick with me and I’ll walk you through kitchen faucet cartridge replacement step by step, from identifying your cartridge to testing the final install.
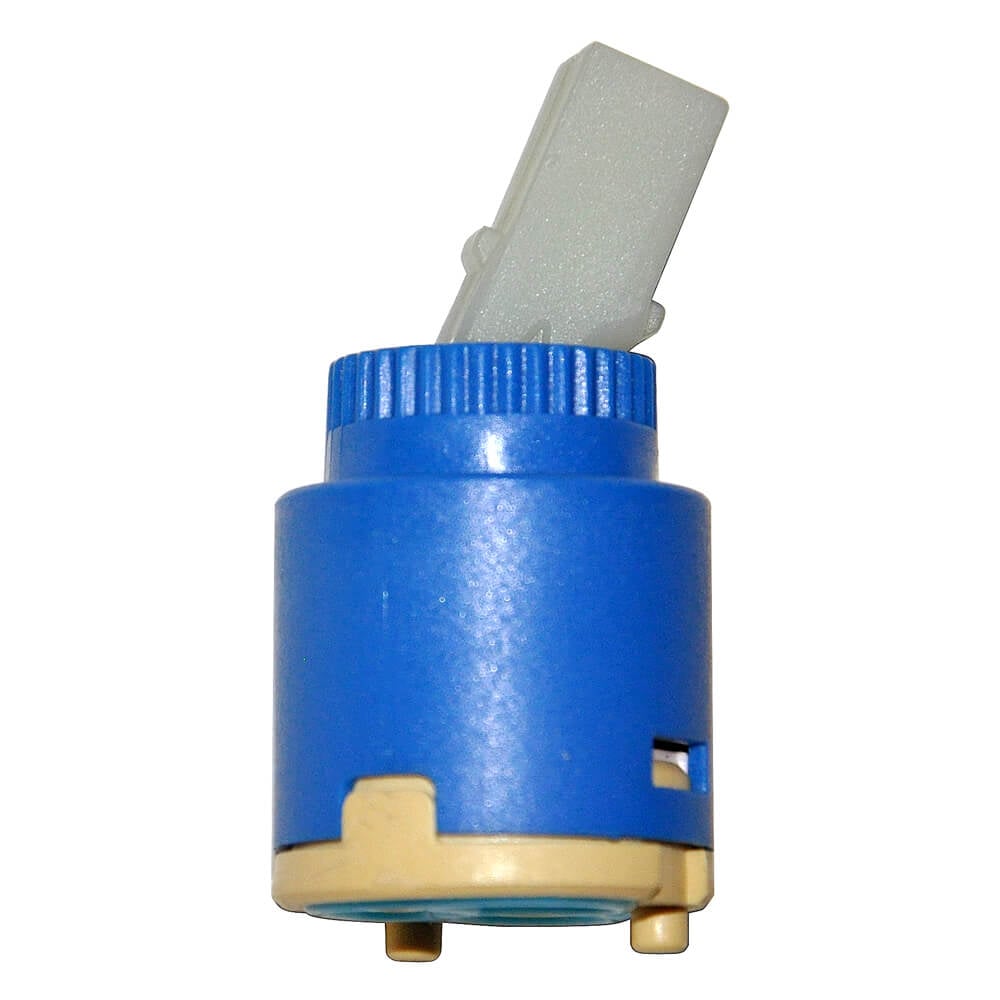
What a faucet cartridge does and how to spot failure
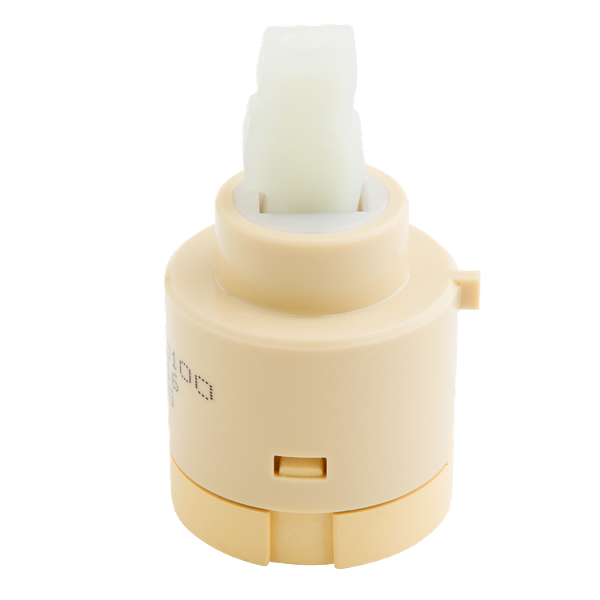
Inside most single-handle kitchen faucets is a cartridge. It mixes hot and cold water and controls flow in one smooth motion. In two-handle faucets, each handle usually has its own cartridge.
Common signs you need kitchen faucet cartridge replacement:
- Drips from the spout after you shut it off
- Stiff or jerky handle movement
- Low flow even with the handle wide open
- Hard-to-set temperature or sudden shifts from hot to cold
Mineral buildup is the top culprit. Age and worn O-rings come next. If these show up, kitchen faucet cartridge replacement is likely the cure.

Source: youtube.com
Tools and materials for kitchen faucet cartridge replacement
Gather everything before you start. A calm setup makes the job easy.
- Adjustable wrench or channel-lock pliers for nuts and caps
- Phillips and flat screwdrivers for handle screws
- Allen key set for hidden set screws
- Needle-nose pliers for retaining clips
- Utility knife and a small pry tool for caps
- White vinegar and a toothbrush to clear mineral scale
- Silicone-based plumber’s grease for O-rings and seals
- Replacement cartridge and any new O-rings the kit includes
- Towels, a bowl, and tape to label parts
Tip from the field: Lay parts on a towel in the order you remove them. It speeds reassembly during kitchen faucet cartridge replacement.
Source: spbuk.pl
Identify your faucet and choose the right cartridge
The right part makes all the difference. Here’s how I match cartridges fast:
- Check the brand logo on the handle, escutcheon, or spout base.
- Take clear photos of the faucet and the old cartridge once removed.
- Count splines on the stem and measure length and diameter if needed.
- Compare to parts charts online or bring the old one to a parts counter.
- Prefer OEM parts for smooth motion and long life.
Note the orientation before you pull the old cartridge. A 180-degree flip can reverse hot and cold. Accurate ID is the heart of stress-free kitchen faucet cartridge replacement.
Source: homedepot.com
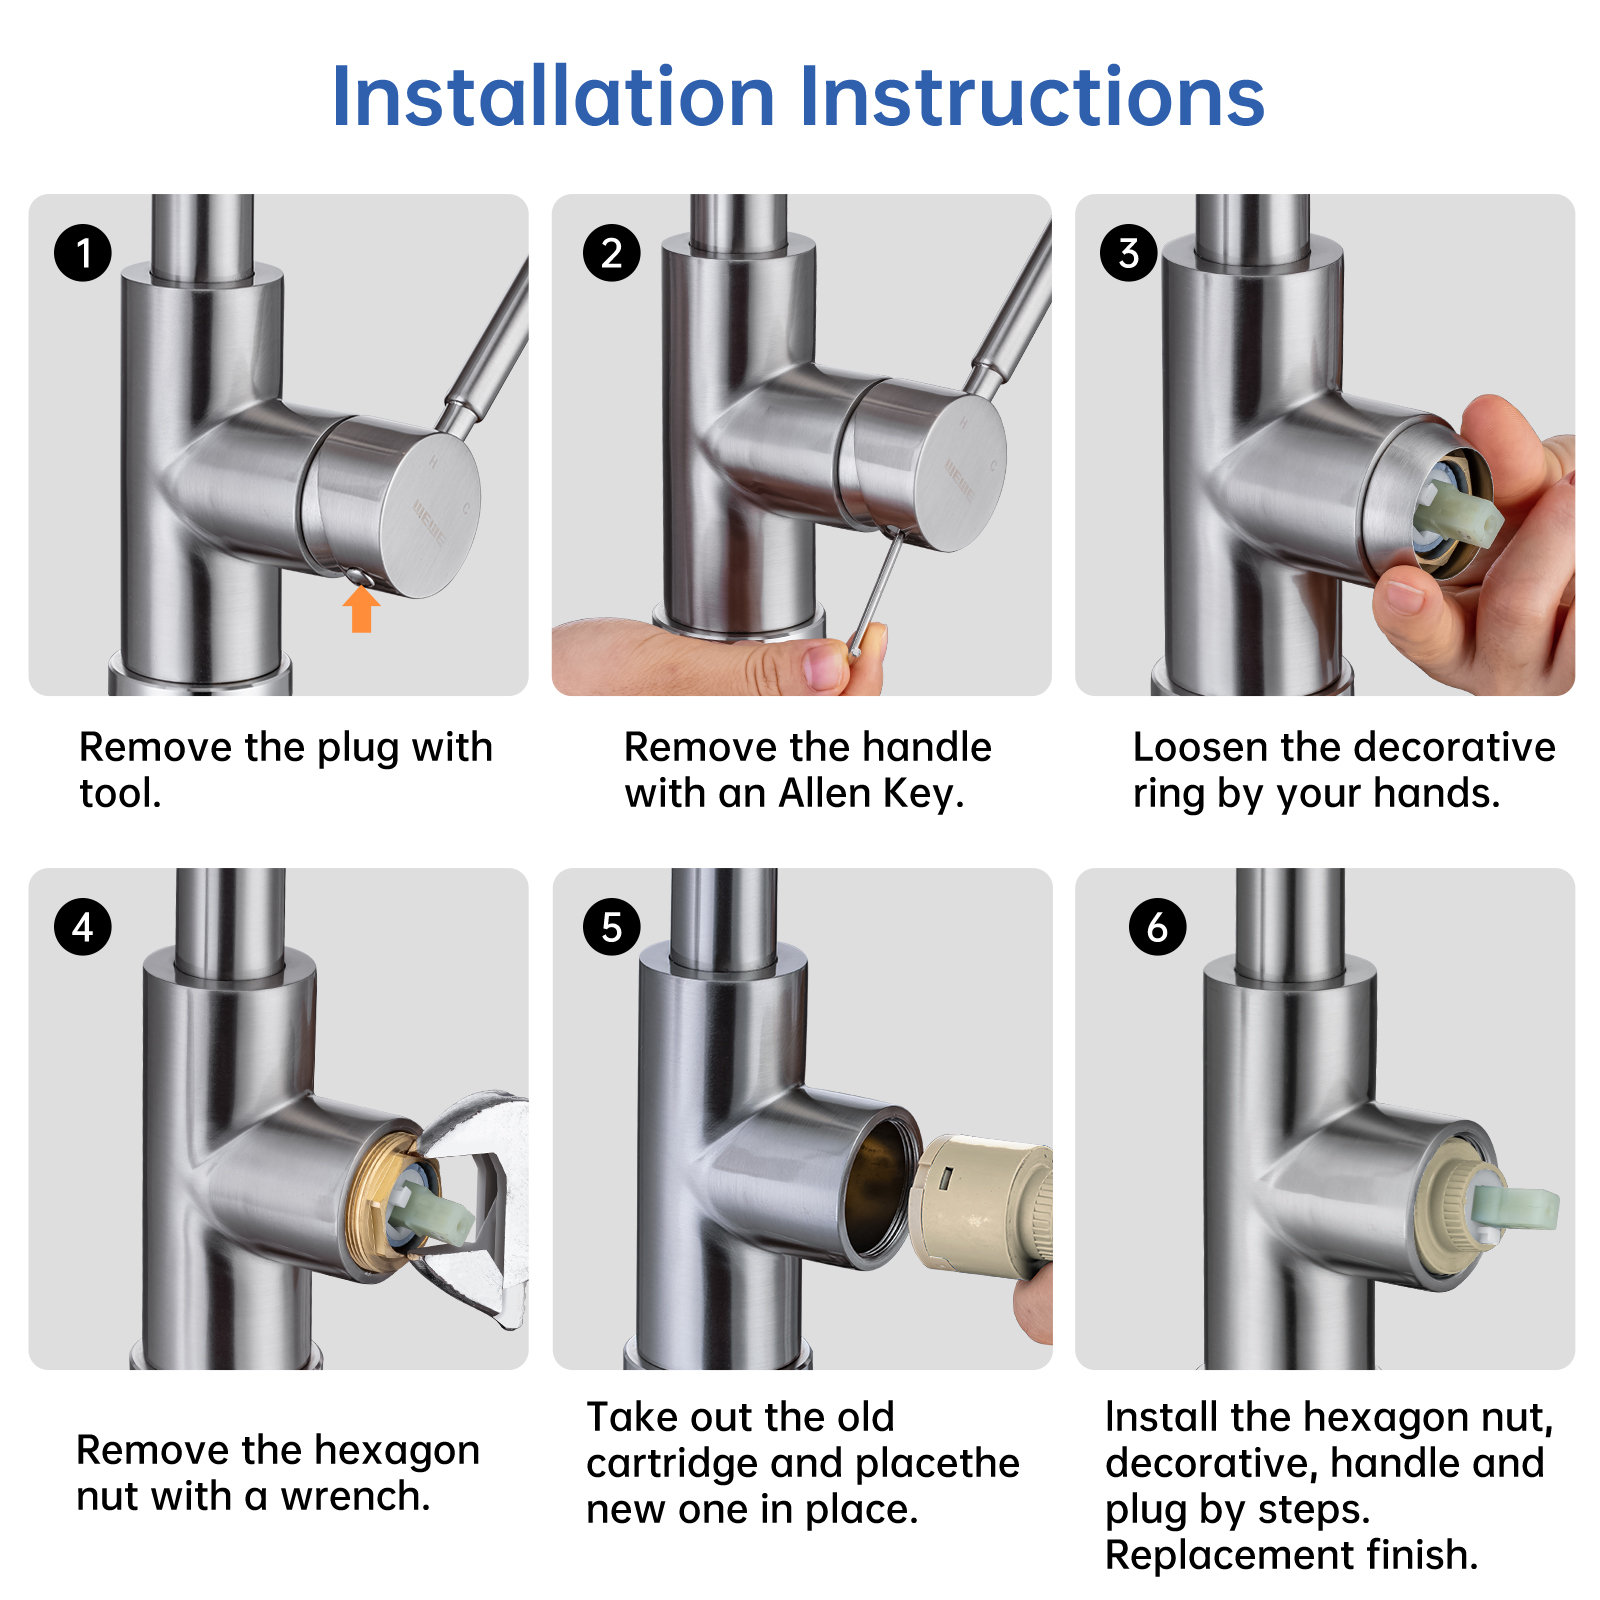
Step-by-step kitchen faucet cartridge replacement
Follow these simple steps. Work slow and steady.
- Shut off water supplies under the sink. Turn handles on to bleed pressure.
- Plug the drain so tiny parts cannot fall in.
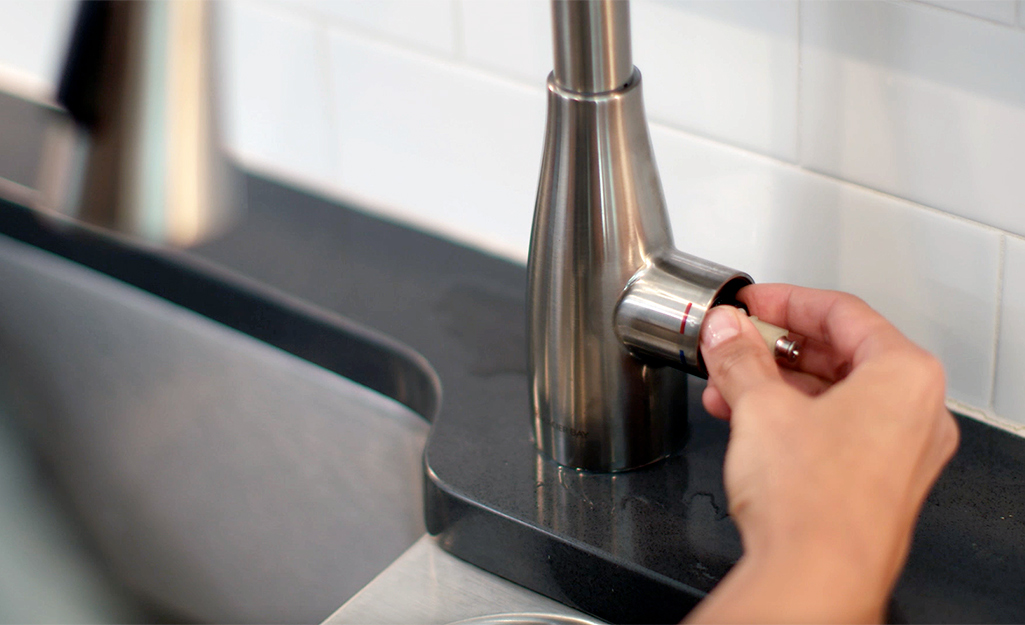
- Pry off the handle cap. Loosen the set screw with the right Allen key. Lift off the handle.
- Remove any dome cover or decorative sleeve by hand.
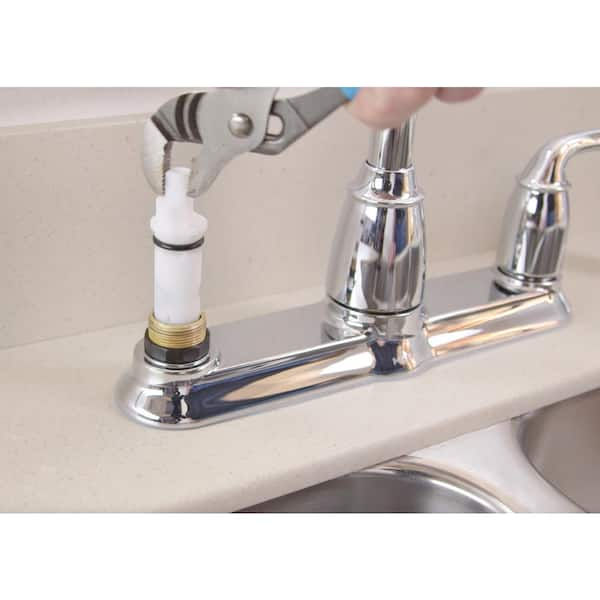
- Take out the retaining nut or U-clip using pliers or a wrench. Keep it safe.
- Wiggle the old cartridge straight up. If stuck, warm the body with a hair dryer for 30 seconds, then pull again. Do not twist hard.
- Clean the valve body. Soak crusted areas with vinegar for five minutes. Brush gently. Rinse.
- Lightly coat new O-rings with silicone grease. Do not use petroleum grease.
- Align the new cartridge as the old one sat. Push it fully home. Reinstall the clip or nut.
- Refit the sleeve and handle. Tighten the set screw snug, not brutal.
- Open the shutoffs. Run water both hot and cold to flush air and debris.
- Check for drips and smooth motion. Re-seat the aerator if flow is uneven.
During kitchen faucet cartridge replacement, do not over-tighten the retaining nut. I’ve seen cracked faucet bodies from one extra turn. Snug is enough.
Source: pfisterfaucets.com
Troubleshooting after kitchen faucet cartridge replacement
If something feels off, try these quick fixes:
- Leak at the base: The clip may not be seated. Remove and re-seat. Check O-rings for nicks.
- Stiff handle: Debris is in the body. Pull the cartridge and flush again. Regrease lightly.
- Low flow: Clean the aerator. Flush both lines for 30 seconds each.
- Wrong temperature swing: The cartridge may be rotated. Flip 180 degrees or adjust the scald stop.
- Noisy pipes: Reduce supply valve opening a bit or add a hammer arrester.
Most issues clear in minutes. Good flushing is the secret to a clean kitchen faucet cartridge replacement.

Source: youtube.com
Brand and model notes for kitchen faucet cartridge replacement
Small details matter by brand:
- Moen: Popular 1225 and 1222/1222B for many single-handle valves. U-clip style retainer.
- Delta: Many use diamond seal or RP50587 mixing cartridges. Some need a special wrench.
- Kohler: Often ceramic cartridges with unique tabs. Orientation is key.
- Pfister and American Standard: Wide range. Match stems and spline counts with care.
Never force parts that do not match. If a part fights you, it is likely the wrong one. Proper fit makes kitchen faucet cartridge replacement smooth and lasting.
Source: piggypats.com
Cost, time, and when to call a pro
Here’s what I see on typical jobs:
- Parts: 15 to 90 dollars depending on brand and features.
- Time: 20 to 45 minutes for most faucets.
- Pro visit: 125 to 250 dollars for diagnosis and install in many regions.
Call a plumber if the shutoff valves leak, the faucet body is cracked, or you face heavy corrosion. Pull-down faucets with integrated check valves can be tricky too. When risk is high, a pro can save your day and still keep kitchen faucet cartridge replacement affordable.
Preventive care after kitchen faucet cartridge replacement
A few simple habits will stretch the life of your new part:
- Rinse the aerator every three months to clear grit.
- Open and close the handle gently. Never force past the stop.
- Check under-sink hoses twice a year for bulges or rust.
- If you have hard water, add a small inline filter or use a softener.
- After work on household plumbing, run the faucet without the aerator to flush sand.
These habits reduce wear and keep your next kitchen faucet cartridge replacement far in the future.
Safety, codes, and eco benefits
Shut off water before you start. Keep power cords and electronics away from the cabinet area. If you adjust temperature limits, aim for a safe max near 120°F to reduce scald risk.
Fixing a drip can save gallons every day. You also cut stress on your water heater. A good kitchen faucet cartridge replacement is a small job with a big eco return. It beats replacing the whole faucet and keeps metal out of the waste stream.
Frequently Asked Questions of kitchen faucet cartridge replacement
How do I know if my faucet has a cartridge or another valve type?
Most modern single-handle kitchen faucets use cartridges. If yours has a ball or compression stem, parts will look different, but the symptoms of wear are similar.
Can I do kitchen faucet cartridge replacement without turning off the water?
No. You must close the hot and cold shutoffs. If there are no valves under the sink, shut off the main water supply.
Do I need plumber’s grease during kitchen faucet cartridge replacement?
Yes, a thin coat of silicone-based grease helps seals seat and move well. Do not use petroleum grease, which can damage rubber.
Why is hot and cold reversed after my repair?
The cartridge likely went in rotated 180 degrees. Pull it, flip it, and reinsert, or adjust the temperature limit stop if your model has one.
How long should a new cartridge last?
With clean water and gentle use, many last 5 to 10 years or more. Hard water or grit can shorten that timeline.
Is an aftermarket cartridge okay for kitchen faucet cartridge replacement?
Sometimes, but OEM parts fit best and move smoother. If price is close, go OEM for fewer headaches.
What if the old cartridge is stuck and will not budge?
Warm the faucet body with a hair dryer and soak with vinegar to loosen scale. Use straight, even pulls and avoid twisting that can crack parts.
Conclusion
A steady drip, a stiff handle, or wild temperatures are all fixable with a simple kitchen faucet cartridge replacement. With the right part, a few tools, and calm steps, you can finish this repair in under an hour and enjoy smooth flow again.
Take action today: identify your faucet, grab the cartridge, and follow the steps above. Want more hands-on guides like this? Subscribe for new tips, or drop a comment with your faucet model and I’ll help you plan your repair.
Pingback: Kitchen Faucet Brushed Nickel: Buyer's Guide 2026
Pingback: Kitchen Faucet Aerator Replacement: Quick DIY Guide 2026
Pingback: How to Remove Moen Kitchen Faucet Easily: Step-by-Step Guide