Removing a Moen kitchen faucet is not as simple as just unscrewing a few bolts. Many homeowners are surprised by hidden steps, special tools, and the importance of proper preparation. The process can be confusing if you have never tackled it before, especially with Moen’s unique designs and fasteners. But with patience and clear instructions, anyone can learn to remove their faucet safely and efficiently. Whether you want to replace your faucet, fix a leak, or update your kitchen, this guide will help you every step of the way.
Why Remove A Moen Kitchen Faucet?
Most people remove their Moen kitchen faucet for a few common reasons. Sometimes the faucet leaks, making the sink area wet and uncomfortable. Other times, the faucet looks old or does not match the new kitchen style. Some homeowners want to upgrade to a faucet with better features, like a sprayer or touchless operation. Occasionally, a faucet stops working due to mineral buildup, broken parts, or rust. Removing the old faucet is necessary before installing a new one.
Removing a faucet can also help you clean the sink area, replace damaged parts, or access plumbing lines. It is important to understand that faucet removal is a crucial step for any kitchen renovation or repair.
Safety And Preparation
Before starting, safety and preparation are key. Many people rush into faucet removal and end up damaging pipes, scratching the sink, or getting injured. Here’s what you should do before you start:
- Turn off the water supply: Find the shut-off valves under the sink and turn them clockwise to stop water flow. If there are no valves, turn off the main water supply for the house.
- Clear out the space: Remove all items from under the sink. This gives you room to work and prevents damage to your belongings.
- Gather tools and materials:
- Adjustable wrench
- Basin wrench (for hard-to-reach areas)
- Screwdrivers (flathead and Phillips)
- Pliers
- Bucket or towels (to catch water drips)
- Flashlight (for dark spaces)
- Pen and paper (to note part positions)
- Safety gloves
- Protect your sink and counter: Place a towel or cardboard around the sink area to prevent scratches or chips.
A beginner mistake is forgetting to turn off the water. This can lead to flooding and costly repairs. Another common error is using the wrong tools. Moen faucets often use specialty nuts or clips, so check your model’s manual or look online for specifics.
Understanding Moen Faucet Types
Moen makes many faucet models, each with its own installation and removal process. Knowing your model is important because the steps can change depending on the faucet type.
Common Moen Kitchen Faucet Types
- Single-handle faucets: These are popular and easy to use. They usually have one handle on top or side and a single mounting nut.
- Double-handle faucets: Two handles for hot and cold water, often with separate mounting nuts.
- Pull-down and pull-out faucets: These have a sprayer hose that pulls out from the spout. Removal requires extra steps for the hose and weight.
- Touchless faucets: Operated by sensors, these often have battery packs or wiring under the sink.
If you are not sure which type you have, look for a model number on the faucet base or under the sink. Moen’s website and manuals can help you identify it.
Moen Faucet Fastening Methods
Moen uses several fastening methods:
- Mounting nuts
- Snap-on clips
- Threaded collars
Some models use a combination of these. Check under your sink to see how your faucet is attached.
Step-by-step Guide To Removing A Moen Kitchen Faucet
The removal process can feel overwhelming, but breaking it down into clear steps helps. Let’s go through each stage so you can follow along easily.
Step 1: Shut Off Water And Power
Start by shutting off the water supply. Locate the shut-off valves under the sink and turn them clockwise. If you have a touchless faucet, unplug the power adapter or remove the batteries.
Place a bucket under the pipes to catch any remaining water. Open the faucet to release pressure and drain excess water.
Step 2: Disconnect Water Supply Lines
Use an adjustable wrench to loosen the water supply lines connected to the faucet base. Hold the pipe steady with one hand while you turn the nut with the other. Remove the hot and cold lines and set them aside.
If your supply lines are old or stuck, spray a bit of penetrating oil and wait a few minutes before trying again.
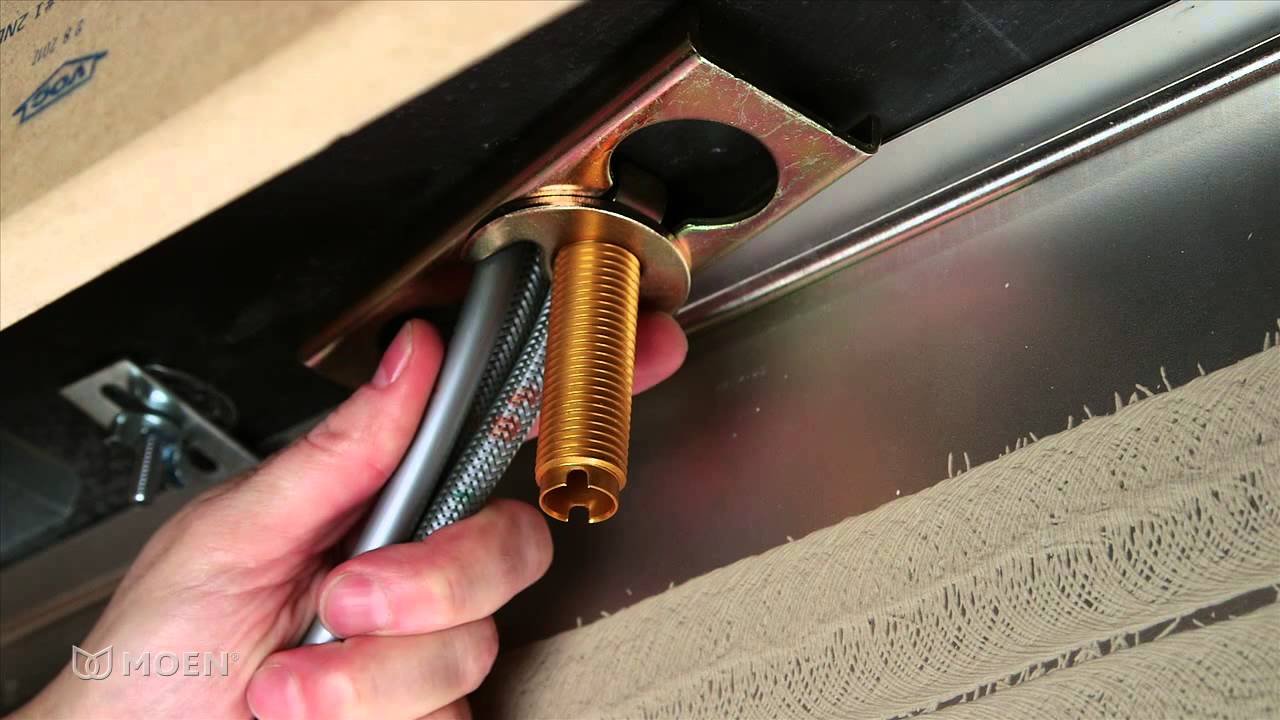
Step 3: Remove Faucet Mounting Nuts Or Clips
This is where most beginners struggle. Moen faucets often use mounting nuts or snap-on clips under the sink. These can be hard to reach, especially in tight spaces.
- For mounting nuts, use a basin wrench to loosen and remove them. Turn counterclockwise until the nut comes off.
- For snap-on clips, press or pull the clips as shown in your model’s manual. You may need pliers for extra grip.
Some faucets have a plastic collar or bracket that must be removed first. Take your time and use a flashlight to see clearly.
Step 4: Detach Faucet From Sink
Once the nuts or clips are off, gently pull the faucet up and out of the sink. If it feels stuck, wiggle it side to side. Mineral buildup or sealant can make removal hard. Use a plastic scraper to loosen the base if needed.
For pull-down or pull-out faucets, disconnect the sprayer hose and weight before removing the faucet. The weight is usually attached with a clip or screw.
Step 5: Remove Escutcheon Plate And Clean Up
Many Moen faucets have an escutcheon plate (the decorative plate under the faucet). Lift this off and set it aside. Scrape off any old sealant or caulk with a plastic tool. Clean the sink area with a damp cloth.
Step 6: Inspect Parts And Take Photos
Take photos of the removed parts and their positions. This helps you reinstall or troubleshoot later. Check for worn washers, broken clips, or damaged hoses. If you plan to reuse the supply lines, inspect them for leaks or cracks.
Step 7: Prepare For New Faucet Installation
With the faucet removed, you are ready for a new installation. Double-check that the sink holes are clean and free of debris. If you are not installing a new faucet right away, cover the holes to keep out dust and pests.
Special Tips For Difficult Removals
Sometimes, removal does not go as planned. Here are practical tips for tricky situations:
- Corroded nuts or bolts: Use penetrating oil and wait 10-15 minutes. Try again with a basin wrench. If stuck, carefully cut the nut with a hacksaw (protect the sink).
- Stuck faucet base: Mineral buildup can glue the faucet to the sink. Apply white vinegar around the base and wait. Gently pry with a plastic scraper.
- Hidden fasteners: Some Moen models hide fasteners behind decorative covers. Look for small screws or pop-off caps.
Beginners often miss the hidden screws or forget to disconnect the sprayer hose. Always check your faucet’s manual or search for your model online.
Data Table: Common Moen Faucet Models And Removal Difficulty
Here is a comparison of popular Moen kitchen faucet models and their removal difficulty.
| Moen Faucet Model | Type | Removal Difficulty | Special Tools Needed |
|---|---|---|---|
| Moen Adler | Single-handle | Easy | Basin wrench |
| Moen Arbor | Pull-down | Medium | Basin wrench, pliers |
| Moen Brantford | Double-handle | Medium | Adjustable wrench |
| Moen Align | Touchless | Hard | Basin wrench, screwdriver |
| Moen Chateau | Single-handle | Easy | Basin wrench |

Credit: diy.stackexchange.com
Mistakes To Avoid When Removing A Moen Kitchen Faucet
Many people make mistakes that lead to extra work or damage. Here are the most common errors and how to avoid them:
- Forgetting to turn off the water: Always shut off the supply before starting.
- Using the wrong tools: A basin wrench is essential for tight spaces.
- Damaging supply lines: Hold pipes steady while loosening nuts to prevent bending.
- Scratching the sink: Use towels or cardboard to protect surfaces.
- Losing small parts: Keep all screws, clips, and washers in a container.
- Skipping the manual: Check your faucet’s manual for specific steps.
- Rushing the process: Take your time, especially with corroded parts.
Two insights that beginners often miss:
- Moen’s unique fastener designs can mean extra steps. Some models use special clips that look like part of the faucet but are actually fasteners.
- Old supply lines can get stuck due to mineral buildup. If you force them, they may snap. Use oil and patience.
Table: Tools Needed For Moen Kitchen Faucet Removal
To make things clearer, here’s a table comparing the tools needed for different Moen faucet types.
| Faucet Type | Essential Tools | Optional Tools | Difficulty |
|---|---|---|---|
| Single-handle | Basin wrench, adjustable wrench | Pliers, flashlight | Easy |
| Double-handle | Basin wrench, screwdriver | Penetrating oil | Medium |
| Pull-down/pull-out | Basin wrench, pliers | Plastic scraper | Medium |
| Touchless | Basin wrench, screwdriver | Wire cutters | Hard |
Credit: www.youtube.com
Cleaning And Maintenance After Removal
After the faucet is removed, cleaning and maintenance matter. Many people ignore this step, but it helps your new faucet last longer.
- Clean sink holes: Remove mineral deposits with white vinegar and a soft cloth.
- Check supply lines: Inspect for cracks or leaks. Replace if needed.
- Clean escutcheon plate: If you plan to reuse it, wash and dry it.
- Seal holes if needed: If you are not installing a new faucet right away, cover the holes to keep out pests.
Proper cleaning prevents future leaks and makes the new installation easier.
Table: Cleaning Agents And Their Effectiveness
Here’s a comparison of common cleaning agents used after faucet removal.
| Cleaning Agent | Effectiveness | Safe for Sink | Cost |
|---|---|---|---|
| White vinegar | Excellent for mineral buildup | Yes | Low |
| Baking soda | Good for mild stains | Yes | Low |
| Lemon juice | Moderate for odor | Yes | Low |
| Commercial cleaners | Excellent for tough stains | Check label | Medium |
How Long Does Faucet Removal Take?
On average, removing a Moen kitchen faucet takes 30–60 minutes for most models. Pull-down and touchless faucets can take longer, up to 90 minutes, due to extra hoses and wiring. If your faucet is old or corroded, expect the process to take up to two hours.
A calm, steady approach is best. Rushing often leads to mistakes and frustration.
Real-life Example: Removing A Moen Arbor Faucet
Let’s look at a real-life example. Maria, a homeowner in Texas, wanted to replace her Moen Arbor pull-down faucet with a new model. She followed these steps:
- Shut off the water and unplug the touchless sensor.
- Cleared out the under-sink area.
- Used a basin wrench to remove mounting nuts.
- Disconnected the sprayer hose and weight.
- Pulled the faucet out slowly, wiggling to loosen it.
- Cleaned sink holes with vinegar.
- Installed a new Moen faucet.
Maria found that the hardest part was loosening the mounting nuts. She used penetrating oil and waited, then tried again. Taking photos of each step helped her remember where parts belonged.
Upgrading After Removal
Once your old faucet is removed, you might be thinking about upgrading. There are many Moen faucet models to choose from, including touchless, pull-down, and designer styles. It’s important to measure your sink holes and check compatibility with your plumbing.
Moen faucets are known for reliability and easy installation. If you want more details on the latest models and installation tips, check the official Moen website or guides like Moen Support.
Common Questions And Troubleshooting
Here are some common problems and how to solve them:
- Cannot loosen mounting nut: Try penetrating oil and a basin wrench. If still stuck, carefully cut the nut.
- Sprayer hose won’t disconnect: Look for a release clip or button. Press and pull gently.
- Water leaks after removal: Check supply lines and shut-off valves. Tighten or replace if needed.
- Parts missing: Use photos and notes to track parts. Order replacements from Moen if needed.
Sometimes, you may need to call a plumber if removal is too difficult or if pipes are damaged.
Saving Money And Time
Removing a faucet yourself can save $75–$200 in plumber fees. The key is to work slowly, use the right tools, and follow each step. If you prepare well, most homeowners can do the job without professional help.
It is also smart to buy extra washers and supply lines before starting, in case replacements are needed. Keeping your sink area clean and organized makes the process easier.
Environmental Impact And Recycling
After removing your old faucet, don’t just throw it away. Most Moen faucets are made of metal and plastic, which can be recycled. Check your local recycling program for rules. You can also donate old faucets to charities or reuse parts for DIY projects.
Frequently Asked Questions
How Do I Identify My Moen Kitchen Faucet Model?
Look for a model number on the faucet base or under the sink. The number is often on a sticker or metal tag. If you cannot find it, take a photo and check Moen’s website for visual identification.
Can I Remove A Moen Faucet Without A Basin Wrench?
It is possible, but much harder. A basin wrench is designed for tight spaces under the sink. Without it, you may struggle to reach and loosen mounting nuts.
What Should I Do If The Faucet Is Stuck Due To Mineral Buildup?
Apply white vinegar around the base and wait 10–15 minutes. Gently wiggle the faucet or use a plastic scraper. Avoid using metal tools that can scratch the sink.
Is It Safe To Reuse Old Supply Lines?
It depends on their condition. Inspect for cracks, leaks, or corrosion. If they look worn, replace them. Reusing damaged lines can cause leaks.
How Much Does It Cost To Remove A Moen Kitchen Faucet Professionally?
Professional removal costs $75–$200, depending on local rates and faucet complexity. Doing it yourself saves money but takes time and patience.
Conclusion
Removing a Moen kitchen faucet is a manageable project if you follow clear steps, use the right tools, and take your time. With proper preparation and patience, you can avoid common mistakes and complete the job successfully. Once the faucet is out, you can upgrade your kitchen, fix leaks, or enjoy a cleaner sink area. If you ever get stuck, remember to check your faucet’s manual, search online for help, or call a plumber for advice. Your new faucet will work better and look great, making all your effort worthwhile.
Pingback: How To Mix And Match Bedroom Furniture: Stylish Tips 2026